500 SERIES FIXTURES USING BRASS SCREWS
The fixtures are designed for electrical boxes with 3.5” center-to-center holes tapped for 8-32 screws. The box should not project beyond the surface of the ceiling. For other conditions, please inquire about custom rosettes.
Align the mounting plate to the electrical box using the larger, slip-through holes. Install the steel screws, letting them project about three quarters of an inch (fig. 1). Attach the leads to the socket. Slip the socket over the screws, turn clockwise so that the mounting plate’s tapped holes appear centered in the socket’s keyhole openings (fig. 2). Tighten the screws. Place the porcelain fixture over the socket and insert the brass screws. Using a hand screw driver tighten just until secure, no more. Do not over-tighten.
To be installed by a licensed electrician.
DOWNLOAD 500 SERIES FIXTURES INSTALLATION INSTRUCTION

fig. 1
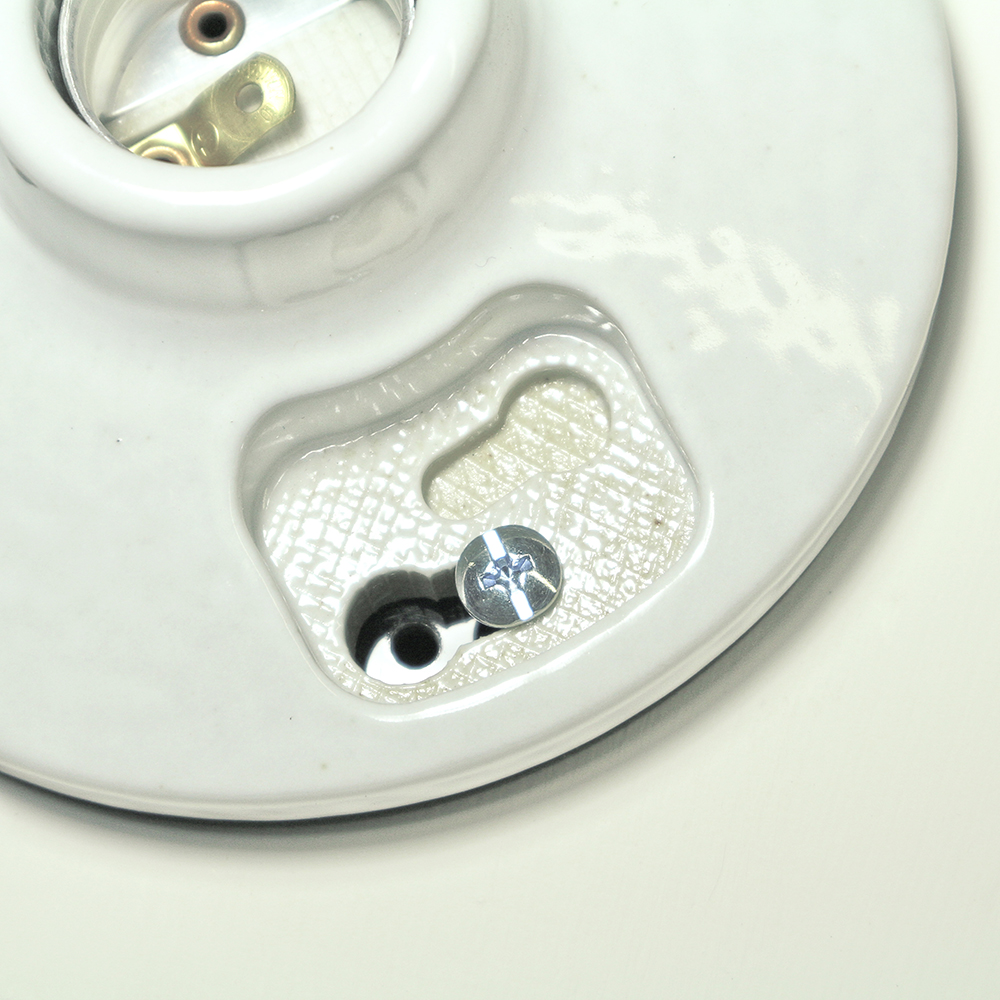
fig. 2
600 SERIES FIXTURES USING BRASS SCREWS
The fixtures are designed for electrical boxes with 3.5” center-to-center holes tapped for 8-32 screws. The box should not project beyond the surface of the ceiling or wall. For other conditions, please inquire about custom rosettes.
Hold the mounting plate to the electrical box, aligning either pair of inner holes with those on the box. Mark a pair of outer holes on the ceiling (fig. 1). Make pilot holes into the ceiling as the brass screws will extend beyond the back of the mounting plate.
Align the mounting plate to the electrical box and install the steel screws, letting them project about three quarters of an inch (fig. 2). Attach the leads to the socket. Slip the socket over the screws, turn clock-wise and tighten the screws. Place the porcelain fixture over the socket, align with the threaded screw holes and insert the brass screws. Using a hand screw driver, tighten just to secure, no more. Do not over-tighten.
To be installed by a licensed electrician.
DOWNLOAD 600 SERIES FIXTURES INSTALLATION INSTRUCTION

fig. 1

fig. 2